Note: While writing this post, VMware has updated the instructions for installing certificates on the vCenter Server Appliance. The KB for this article can be found here.
In my last post, I walked through the process of generating the SSL certificates using OpenSSL and the OpenSSL configuration files for each service on the vCenter 5.5 appliance. So now that you have your SSL certificates, keys, and certificate authority chain, you can install them on your vCenter Server Appliance. This isn’t as hard as it actually looks, but the VMware documentation does miss a couple of the steps that are needed to do this successfully.
Getting Started
If you’re like me and using a Windows machine, or if your employer only provides you with a Windows machine, you’ll need to make sure you have a few tools installed in order to change the SSL certificates on the vCenter Appliance. Those tools are:
-
An application to transfer files to a Linux machine (I use WinSCP, which can be downloaded from here)
-
An SSH client application (I use PuTTY, which can be downloaded from here)
If you’re comfortable a Linux command shell, this process should be pretty straightforward. Until a year or two ago, I wasn’t, and I know that there are a lot of other Admins out there who don’t have a lot of Linux experience, so I tried to include all of the required commands and screenshots where possible.
Converting the Certificate Chain to .pem
The Microsoft certificate authority only provides certificate chains in a .p7b file format, and these cannot be used on the Linux appliance. So before you copy any files over to the appliance, you will want to convert the certificate chain from your certificate authority from a .p7b file to a .pem file. Since the OpenSSL components are installed on your computer, you might as well do this before copying anything over to the Linux appliance.
To convert the .p7b file to a .pem file, you need to open the windows command prompt as an administrator, navigate to where your certificate chain file is stored, and run the following command:
openssl pkcs7 -print_certs -in certchainname.p7b -out cachain.pem

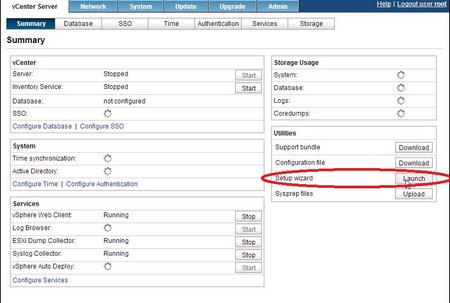
This will create a new certificate file in the .pem format. You will need to edit the file slightly to remove a few lines of text as the pem file, so you will need to open it up in a text editor. You will want to remove the lines before each “—–BEGIN CERTIFICATE—–.” These lines may start with “subject=” and “issuer=” like the screenshot below.
![]()
After you save the changes to the .pem file, you should copy it into the folders that you created for each certificate. This will make it easier to work with the chains when you copy the files over to the appliance.
Copying the Certificate Files to the Appliance
Note: I do not use the Auto Deploy service in my lab at this time. Therefore, I will not be covering updating those certificates. I will probably cover this in a future post.
You will need to copy the certificate files, private keys, and the certificate chains over to the appliance before you can change the certificate that each service uses. You will need to open WinSCP and log into the vCenter Server Appliance as root (default password is vmware).

After you successfully login, you may see a MotD banner like the one below. You can click Continue to finish logging in.

Once you have logged in, you will need to navigate to the /SSL folder. This is where you will copy the certificate files, private keys, and the certificate authority chain to. You will need to create three folders inside the /SSL folder for the three groups of files that will need to be copied over. Those folders should be named:
- vpxd
- inventoryservice
- logbrowser

After these folders have been created, you will need to copy over your certificate files to each of these folders. WinSCP allows you to copy by dragging the files from the left side of the screen, which is your local computer, to the right side of the screen, which is the remote computer. When you have finished copying your files, you should have the certificate file (.crt), the certificate chain file (.pem), and the certificate private key file (.key) in each folder.
Updating the vCenter Service (vpxd) Certificate
After you’ve copied over your certificate files, it’s time to rock and roll. Updating the certificates on your vCenter Appliance isn’t that difficult, but it does require a little bit of command-linefu to make the magic happen. Before we can start, you need to log into your vCenter appliance using PuTTY to access the command line as the root user.
The first thing that you need to do is stop the vCenter Server service and the Single Sign-On Service. The command to stop these services is:
service vmware-stsd stop
service vmware-vpxd stop
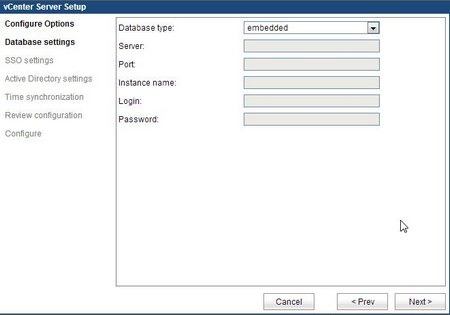
After you have stopped these services, you need to change directories to /ssl/vpxd so we can create a certificate chain file that will be used by the vpxd service. This is a step that the VMware Documentation missed, but it isn’t hard to do. To create this file, you need to run the following command:
[sourceode]cat certificatefile.crt chainfile.pem > chain.pem[/sourcecode]
![]()
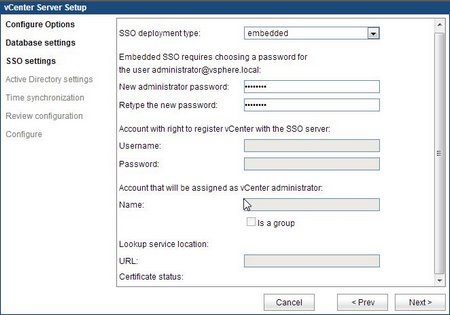
Once the chain.pem file has been created, you are ready to change the certificate for the vCenter Service. You need to run the following command to make this change:
/usr/sbin/vpxd_servicecfg certificate change chain.pem vpxdkeyfilename.key
![]()
If this completes successfully, you should receive a VC_CFG_RESULT=0. If you receive a result that is not VC_CFG_RESULT=0, you can check this VMware KB article to find out what the problem is. Also check you file names to make sure that you have the correct chain file and key file names.
If everything has completed successfully, you will need to restart the SSO service before continuing on to change the Inventory Service Certificate. The command to restart this service is:
service vmware-stsd start
Changing the Inventory Service Certificate
The next certificate that you need to update is the vCenter Inventory Service certificate. Unlike the other two services on the vCenter Server appliance, the certificate chain for this service needs to be converted to a pfx file. Updating this certificate is a little more complicated as well since you need to unregister the Inventory Service from the Single Sign-On service before you can update the certificate. This is a step that will also need to be repeated with the Log Browser Service.
In order to unregister the Inventory Service, you need to enter the following commands on the appliance:
cd /etc/vmware-sso/register-hooks.d
./02-inventoryservice --mode uninstall --ls-server https://server.domain.com:7444/lookupservice/sdk

You will need to change the url in the second command by replacing server.domain.com with the fully qualified domain name of your appliance.
After you have successfully unregistered the Inventory Service, you will need to navigate to /ssl/inventoryservice to work with the certificate files that you copied over earlier. The first thing that needs to be done is to rename the rui_inventoryservice.crt and rui_inventoryservice.key files and remove the _inventoryservice from the file names. When this is done, the files should be named rui.crt and rui.key. There are multiple ways to do this with Linux, including using cat command to read the contents into a new file or copying the files to a new file name. One of the cleaner methods is to use the mv (move) command. The commands for this task are:
 mv rui_inventoryservice.crt rui.crt
mv rui_inventoryservice.key rui.key
Before you can create the pfx file that the Inventory Service needs, you need to create a certificate chain consisting of the rui.crt and the certificate authority chain.
cat rui.crt cachain.pem > chain.pem
With the certificate chain file created, you can move onto creating the pfx certificate file for the Inventory Service. Like everything that we’ve done with certificates so far, we’ll be using the OpenSSL command to create the file. The command to create the pfx file is:
openssl pkcs12 -export -out rui.pfx -in chain.pem -inkey rui.key -name rui -passout pass:testpassword
After you have created the PCKS12 file, you will need to copy it along with the rui.crt and rui.key files to /usr/lib/vmware-vpx/inventoryservice/ssl. The command to do this is:
cp rui.pfx rui.crt rui.key /usr/lib/vmware-vpx/inventoryservice/ssl
After you have copied the files, you will need to change to the investory service ssl directory and modify the permissions on the files. The rui.pfx file is set to be read-only by the file owner, and the other two files are set to read-write by the owner and read by everyone else. The commands to do this are:
cd /usr/lib/vmware-vpx/inventoryservice/ssl/
chmod 400 rui.key rui.pfx
chmod 644 rui.crt
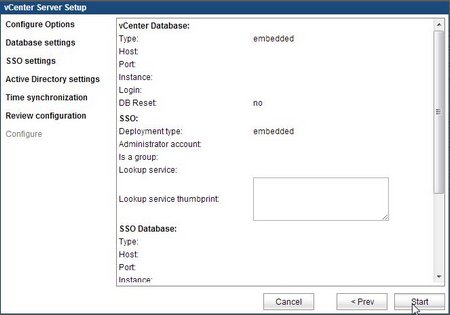
Finally, you need to reregister the Inventory Service with the Single Sign-On service. When you do this, it will use the new certificate file that you placed in the directory. Before you do this, you will want to run the unset HISTFILE command since you will be entering a plaintext password for a user account that has administrator rights to your single sign-on service. To run this command successfully, you need to change “server.domain.com” to your server’s fully qualified domain name, sso_administrator to an administrator account in your SSO administrator (probably administrator@vsphere.local) and sso_password with your SSO password (if you ran the default config, it is blank).
cd /etc/vmware-sso/register-hooks.d
./02-inventoryservice --mode install --ls-server https://server.domain.com:7444/lookupservice/sdk --user sso_administrator --password sso_administrator_password
A successful result will look like the screenshot below:

You can have the vCenter inventory service reregister itself on a reboot by entering the following command:
rm /var/vmware/vpxd/inventoryservice_registered
You can also reregister the service manually by restarting the vpxd and inventory services.
service vmware-inventoryservice stop
service vmware-vpxd stop
service vmware-inventoryservice start
service vmware-vpxd start

Replacing the Log Browser Certificate
Note: This will be the last certificate that we replace in this tutorial as the Auto Deploy certificate is not required if Auto Deploy is not used in your environment.
The last certificate that we need to replace is the Log Browser Service certificate. The process for replacing the Log Browser certificate is very similar to replacing the certificate for the Inventory Service, and you will need to take many of the same steps to complete this task.
To start this process, you will need to unregister the Log Browser service from Single Sign-On. You can do this with the following command after replacing server.domain.com with your appliance’s fully qualified domain name:
cd /etc/vmware-sso/register-hooks.d
./09-vmware-logbrowser --mode uninstall --ls-server https://server.domain.com:7444/lookupservice/sdk
After you have successfully unregistered the Log Browser Service, you will need to change to the /ssl/logbrowser directory so you can work with the certificates that you copied over from your machine. The process is similar to what you did with the Inventory Service certificates, and you will need to remove the _logbrowser from the file names before creating a .pfx certificate file. The steps we need to take, like the Inventory Service above, are to rename the certificate and key files, concatenate the certificate and the certificate chain, and then create the .pfx certificate file. The commands to do this are:
 mv rui_logbrowser.crt rui.crt
mv rui_logbrowser.key rui.key
cat rui.crt cachain.pem > chain.pem
openssl pkcs12 -export -out rui.pfx -in chain.pem -inkey rui.key -name rui -passout pass:testpassword
After you create the rui.pfx file, you will need to copy the rui.pfx, rui.crt, and rui.key files to /usr/lib/vmware-logbrowser/conf and then change the permissions on the certificate files. The commands for this is:
cp rui.pfx rui.crt rui.key /usr/lib/vmware-logbrowser/conf
cd /usr/lib/vmware-logbrowser/conf
chmod 400 rui.key rui.pfx
chmod 644 rui.crt
The last step is to reregister the Log Browser service. The command to do this is below. To run this command successfully, you need to change “server.domain.com” to your server’s fully qualified domain name, sso_administrator to an administrator account in your SSO administrator (probably administrator@vsphere.local) and sso_password with your SSO password (if you ran the default config, it is blank).
cd /etc/vmware-sso/register-hooks.d
./09-vmware-logbrowser --mode install --ls-server https://server.domain.com:7444/lookupservice/sdk --user sso_administrator --password sso_administrator_password
A successful result will look like the screenshot below:

If you received a success result, you will need to restart the Log Browser service by using the following commands:
service vmware-logbrowser stop
service vmware-logbrowser start
The Log Browser service is the last certificate that we’re changing, so you will need to reboot the appliance after you have successfully updated the certificate. The reboot allows all of the new certificates to take effect, and you may encounter certificate errors when logging into the web interface or the C# client until you reboot the appliance.
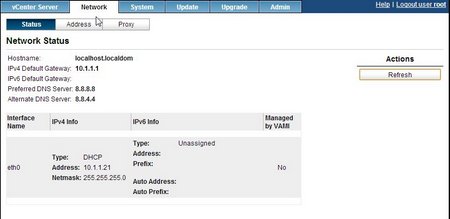
After a reboot, you shouldn’t see any certificate warnings when logging into the Appliance management webpage or the vSphere Web Client…provided that you’ve installed the root and intermediate certificates on your machine.


Look, Ma! No Certificate Warnings!
This wraps up the process of updating certificates on the vCenter 5.5 appliance. I will be coming back to the vCenter Server Virtual Appliance in the coming weeks when I tackle building a VMware Horizon View environment on vSphere 5.5 (spoilers – Horizon View 5.2 works on vSphere 5.5), but I will be moving on to some other topics that I want to cover.