Horizon 8.0 Part 9: Creating Your First Desktop Pool

This week, we’re going to talk about desktop pools and how to create your first desktop pool in your new Horizon environment.

Desktop Pools – Explained

So what is a desktop pool?

Desktop pools are a logical grouping of virtual machines that users can access, and these groupings control specific settings about the pool. This includes how the desktops are provisioned and named, protocols that are available for connectivity, and what physical infrastructure they are deployed on.

Horizon has a few different types of desktop pools.  Each pool handles desktops in different ways, and they each have different purposes.  The type of pool that you select will be determined by a number of factors including the use case, the storage infrastructure and application requirements.

The type of desktop pools are:

  • Full Clone Pools – Each virtual desktop is a full virtual machine cloned from a template in vCenter.  The virtual machines require a desktop management tool for post-deployment management.  VMs are customized using existing Guest Customization Specifications. These desktops usually persist after the user logs out.
  • Linked Clone Pools – Each virtual desktop is based on a parent VM snapshot and shares its disk with the parent virtual machine.  Changes to the linked clone are written to a delta disk.  The virtual machines are managed by View Composer.   Linked Clone desktops can be Floating or Dedicated assignment, and they can be configured to be refreshed (or rolled back to a known good snapshot) or deleted on logoff. Linked Clone desktops are officially deprecated in Horizon 2006, and they will be removed in a future release.
  • Instant Clone Pools – Each virtual desktop is based on a parent VM snapshot. The snapshot is cloned to a VM that is deployed to each host, powered up, and then stunned. All guest VMs are then “forked” from this VM and quickly customized. Guest VMs share virtual disks and initial memory maps with the parent VMs.  VMs are managed by vCenter and a “next generation” Composer that is built into the Connection Servers.
  • Manual Pools – The machines that make up the manual pool consist of virtual and/or physical machines that have had the View Agent installed.  These machines are not managed by Horizon.
  • Remote Desktop Session Host Pool – The machines that make up these pools are Windows Servers with the Remote Desktop Session Host Role installed.  They can be provisioned as linked clones or manually, and they are used for published desktops and published applications.

There is one other choice that needs to be selected when creating a desktop pool, and that is the desktop assignment type.  There are two desktop assignment types:

  • Floating Assignment – Desktops are assigned to users at login and are returned to the pool of available desktops when the user signs out.
  • Dedicated Assignment – Desktops are assigned to a user, and the user gets the same desktop at each login.  Desktops can be assigned automatically at first login or manually by an administrator.

Creating Your Desktop Image

Before you can create a desktop pool, you need to have configured a desktop virtual machine with all of your applications and optimizations configured.  This virtual machine will be the template or gold pattern for all of the virtual machines that Horizon will deploy as part of the pool.

The virtual desktop template details, including the virtual machine specifications and installed applications, will depend on the results of any use case definition and desktop assessment exercises that are performed during the project’s design phase.  

I won’t cover how to create a desktop or RDSH template in this series.  Instead, I recommend you check out the Building an Optimized Windows Image guide on VMware Techzone or Graeme Gordon‘s session from VMworld – DWHV1823 Creating and Optimizing a Windows Image for VDI and Published Applications.

Creating A Desktop Pool

For this walkthrough, I will be doing an Automatic Floating Assignment Instant-Clone desktop pool.  These are otherwise known as Non-Persistent desktops because the desktop is destroyed when the user signs out.

If you’re familiar with previous versions of the series, you’ll notice that there are more screens and the order that some steps are performed in has changed.  Please note that some of the menu options will change depending on the type of desktop pool you’re provisioning.

1. Log into the Horizon 7 Administrator.  Under Inventory, select Desktops.

2.  Click Add to add a new pool.

3. Select the Pool Type that you want to create.  For this, we’ll select Automated Pool and click Next.

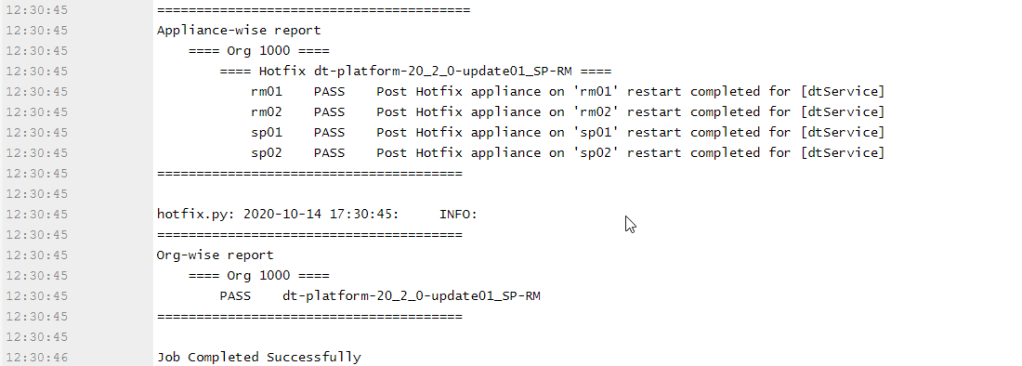
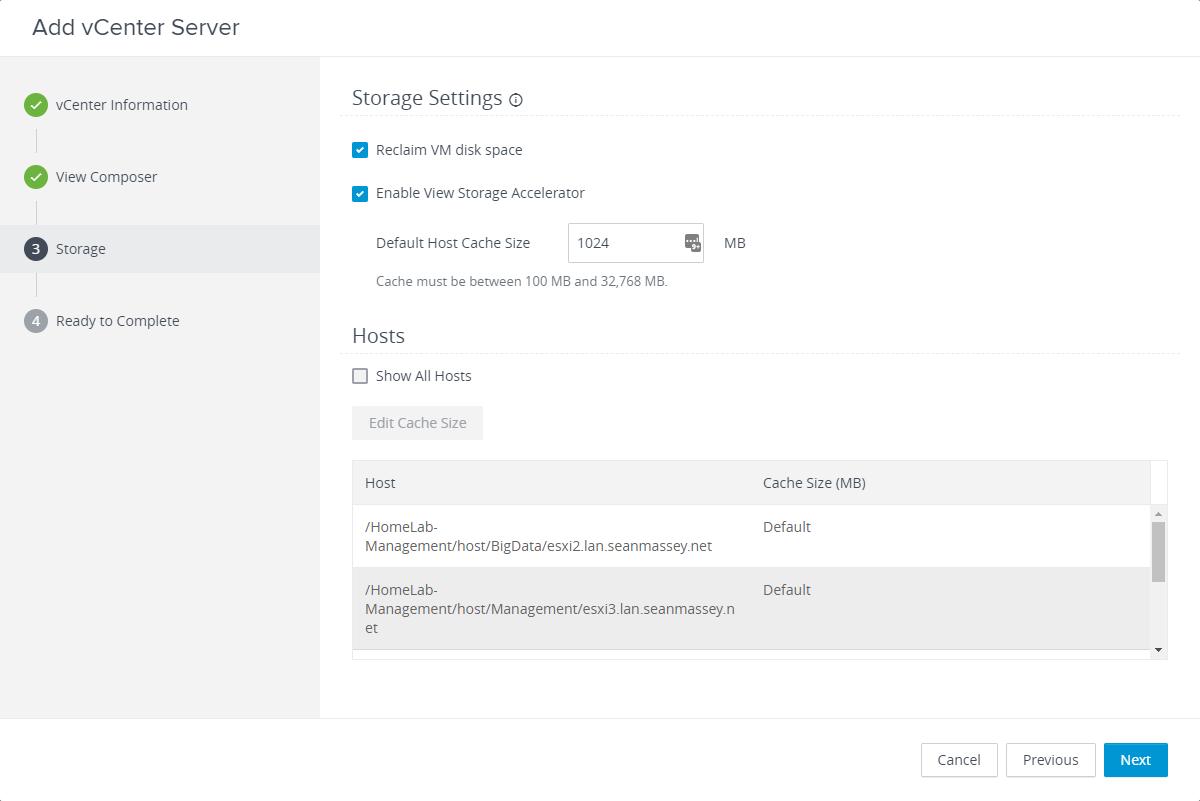
Note: In some environments, you may see the following error if you’re using Instant Clones when View Storage Accelerator is disabled. 

4.  Choose the type of virtual machines that will be deployed in the environment. For this walkthrough, select Instant Clone. If you have multiple vCenter Servers in your environment, select the vCenter where the desktops will be deployed. Click Next.

5. Select whether you want to have Floating or Dedicated Desktops. For this walkthrough, we’ll select Floating and click Next.

Note: The Enable Automatic Assignment option is only available if you select Dedicated. If this option is selected, View automatically assigns a desktop to a use when they log in to dedicated pool for the first time.

6. Select whether VSAN will be used to store desktops that are provisioned by Horizon.  If VSAN is not being used, select the second option – “Do Not Use VSAN.

If you want to store the Instant Clone replica disks that all VMs are provisioned from on different datastores from the VMs, and you are not using VSAN, select the Use Separate Datastores for Replica and Data Disks.

7. Each desktop pool needs an ID and, optionally, a Display Name.  The ID field is the official name of the pool, and it cannot contain any spaces.  The Display Name is the “friendly” name that users will see when they select a desktop pool to log into.  You can also add a description to the pool.

8. Configure the provisioning settings for the pool.  This screen allows you to control provisioning behavior, computer names, and the number of desktops provisioned in the pool.

9. After configuring the pool’s provisioning settings, you need to configure the pool’s vCenter settings.  This covers the Parent VM and the snapshot that the Instant Clones will be based on, the folder that they will be stored in within vCenter, and the cluster, datastores, and, optionally, the networks that will be used when the desktops are deployed.

In order to configure each setting, you will need to click the Browse button on the right hand side of the screen.  These steps must be completed in order.

9-A. First, select the parent VM that the Instant Clone desktops will be based on.  Select the VM that you want to use and click Submit.

9-B. The next step is to select the Parent VM snapshot that the Instant Clone desktops will be based on.  Select the snapshot that you want to use and click OK.

9-B. After you have selected a Parent VM and a snapshot, you need to configure the vCenter folder in the VMs and Templates view that the VMs will be placed in.  Select the folder and click OK.

9-D. The next step is to place the pool on a vSphere cluster.  The virtual machines that make up the desktop pool will be run on this cluster, and the remaining choices will be based on this selection.  Select the cluster that they should be run on and click OK.

9-E. The next step is to place the desktops into a Resource Pool.  In this example, I have not resource pools configured, so the desktops would be placed in the Cluster Root.

9-F. Next, you will need to pick the datastores that the desktops will be stored on. 

9-G. When using Instant Clone destops, you will have the option to configure the network or networks that the desktops are deployed onto. By default, all desktops are deployed to the same network as the parent VM, but administrators have the ability to optionally deploy virtual desktops to different networks.

10. After configuring the vCenter settings, you need to configure the Desktop Pool settings. These settings include:

  • Desktop Pool State – Enabled or Disabled
  • Connection Server Restrictions
  • Pool Session Types – Desktop only, Published Applications, or Both
  • Disconnect Policy
  • Cloud Management – Enable the pool to be consumed by the Universal Broker service and entitled from the Horizon Cloud Service

12. Configure the remote display settings. This includes choosing the default display protocol, allowing users to select a different protocol, and configuring the 3D rendering settings such as enabling the pool to use NVIDIA GRID vGPU. Administrators can also choose to enable Session Collaboration on the pool.

13. Configure Guest Customization settings by selecting the domain that the provisioned desktops will join, the OU where the accounts will be placed and any scripts that will be run after provisioning.

14. Review the settings for the pool and verify that everything is correct.  Before you click Finish, check the Entitle Users checkbox in the upper right.  This will allow you to select the users and/or groups who have permission to log into the desktops.

15. After you click Finish, you will need to grant access to the pool.  View allows you to entitle Active Directory users and groups.  Click Add to entitle users and groups.

16. Search for the user or group that you want to add to entitle.  If you are in a multi-domain environment, you can change domains by selecting the domain from the Domains box.  Click on the users or groups that you want to grant access to and click OK.

Note:  I recommend that you create Active Directory security groups and entitle those to desktop pools.  This makes it easier to manage a user’s pool assignments without having to log into View Administrator whenever you want to make a change.

17. Review the users or groups that will be entitled to the pool, and click OK.

19. You can check the status of your desktop pool creation in vCenter.  If this is a new pool, it will need to complete the Instant Clone provisioning process. To learn more about the parent VMs that are provisioned when Instant Clone pools are created, please see this article for traditional instant clones or this video for Instant Clone pools using Smart Provisioning.

Once the desktops have finished deploying, you will be able to log into them through the Horizon HTML5 Client or the Horizon Client for your endpoint’s platform.

I realize that there are a lot of steps in the process of creating a desktop pool.  It doesn’t take nearly as long as it seems once you get the hang of it, and you will be able to fly through it pretty quickly.

Applying the DaaS 9.0.1 Update

Earlier this week, VMware released the first major update bundle for the Horizon DaaS platform. This update applies some fixes to the platform and updates the desktop agent bundle to include the Microsoft Teams support that was released with Horizon 8. You can find the release notes here.

Background

Today, I will walk through how to apply the update in your environment. But before I do that, I want to give a little background on DaaS.

Horizon DaaS is VMware’s Desktop-as-a-Service Platform. It is typically used by organizations that want to provide a multi-tenant platform for hosting desktops and published applications. While the Horizon Client and the desktop agent are shared with Horizon 7, the management plane for the service providers and the tenants is built from the ground up to support multitenancy.

DaaS 9.0 was released back in May, and it contained some major enhancements to the platform. One of these enhancements was automating the lifecycle of the service provider and tenant appliances, including applying hotfixes using a ne set of appliances and components called Horizon Version Manager and Horizon Air Link.

DaaS utilizes virtual appliances, deployed in pairs for high availability, for service provider and tenant operations. Prior to DaaS 9.0, all of the deployment and update operations had to be performed manually, and this could take hours in large environments with a lot of customers as the updates had to be deployed and installed on two appliances for each tenant.

Checking the Environment’s Health

The first thing that should be done before deploying any hotfixes or patches in the DaaS environment is evaluating the environment’s health. The patching operation for the service provider or tenant management infrastructure will fail if one of the appliances in the pair is in an unhealthy state.

The steps to perform a quick health check are:

  1. Log into the DaaS Service Center
  2. Go to the Appliances menu and select Browse Appliances.

3. Validate that all appliances have a green Up arrow next to their name as shown in the picture below.

Any appliances in an unhealthy state will need to be investigated, and you will need to troubleshoot the appliances. If basic troubleshooting does not resolve the issue, you can open a ticket with GSS to investigate further.

GSS may have you redeploy the appliance if the issues are not easily resolved. You can redeploy appliances by clicking the Actions menu for the appliance and selecting the Restore option. This will deploy a new appliance and sync it with the other appliance in the HA pair.

Preparing for the DaaS Update

The process for applying hotfixes and upgrades has changed in DaaS 9. The process is automated, and it is managed through the Horizon Version Manager interface. Before we go into this interface, there are a few tasks that you need to perform to prepare to deploy the hotfix.

Before we begin, there are some components that need to be downloaded from My VMware. The DaaS update has four components. Two are the hotfixes that will be installed on appliances that have already been deployed, and two files will be used when deploying new appliances.

Note: There is also an updated version of the Horizon Version Manager appliance that was released as part of DaaS 9.0.1. This post is just about deploying the hotfix components to the tenant and service provider appliances, so we will not be talking about the new HVM.

These files are:

Component NameDescription
dt-platform-20_2_0-update01_SP-RM.tgzCumulative Update to Horizon Daas 9.0.0 for Service Provider appliances
dt-platform-20_2_0-update01_TA-DM.tgzCumulative Update to Horizon Daas 9.0.0 for Tenant appliances
dt-aux-20_2_0.debHorizon DaaS 9.0.1 Core Platform Debian
node-manifest.jsonUpdated Node Manifest file used to validate deb component checksums

Update: The dt-aux-20_2_0.deb and node-manifest.json files (listed below) are not used when applying a hotfix to a DaaS environment. These files are only used when performing an upgrade from 8.0.1 to 9.0.1 or deploying new management appliances and new tenants in an existing DaaS 9.0.1 environment. It is important to update the deb files in the install cache so that new management appliances and tenants do not need to have the updates applied after deployment. This was originally not clear.

Once you have these files downloaded, you will need to upload them to the Horizon Version Manager appliance. If you are using a Windows machine, you will need to use a tool like WinSCP to complete this task.

These files need to be uploaded to the following folders on the Horizon Version Manager appliance:

Component NameUpload Path
dt-platform-20_2_0-update01_SP-RM.tgz/opt/vmware/hvm/hotfixes
dt-platform-20_2_0-update01_TA-DM.tgz/opt/vmware/hvm/hotfixes
dt-aux-20_2_0.deb/opt/vmware/hvm/install-upgrade
node-manifest.json/opt/vmware/hvm/install-upgrade
Note: When you upload the dt-aux and node-manifest files in a deployed environment, you will be prompted to replace the existing files. The old files will need to be replaced.

File ownership and permissions will need to be updated on the new files after they have been uploaded. The Rundeck group should have the group ownership of these files, and the permissions should have an octal value of 644. If you are using WinSCP on Windows, you can set the permissions for these files through the properties menu.

Deploying the Hotfix

Once the health of the environment has been validated and the update components downloaded and staged, it’s time to deploy the hotfix.

As mentioned above, the hotfix will be deployed to all appliances using Horizon Version Manager interface. At a high level, the update process looks like this:

  1. Refresh the list of available hotfixes – this job looks at the hotfixes available in the /opt/vmware/hvm/hotfixes folder and updates the list of available hotfixes to include any new files that have been added.
  2. Apply hotfixes to DaaS appliances – Deploys hotfixes to DaaS appliances in the specified tenants

The steps for deploying the DaaS hotfixes are:

  1. Log into your Horizon Version Manager interface
  2. Select Horizon DaaS Hotfix Management

3. Click 1. Refresh Hotfix List

4. Click Run Job Now.

5. Wait for the job to complete. After the job completes successfully, return to the Horizon DaaS Hotfix Management job list by clicking Jobs on the left-hand menu.

6. Click 3. Apply Hotfix to DaaS Appliances.

7. Fill in the following details:

  • ServiceProvider-IP: IP address or FQDN of one of the Service Provider appliances
  • ServiceProvider-Appliance-Password: The password for the desktone user on the appliance
  • Domain-Name: NetBIOS name for the Service Provider Active Directory environment
  • Domain-User: Active Directory User with administrator rights in the Service Provider admin console
  • Domain-Password: Password for the administrator user
  • Org-DaaS-Version: Select the version of your DaaS organization from the dropdown box
  • Hotfix: Select the hotfixes that you wish to apply in the environment. For DaaS 9.0 Update 1, there is an update bundle for the Service Provider appliances, and there is an update bundle for the Tenant appliances
  • Org-IDs: Enter the DaaS organization IDs for the tenants you want to apply the hotfix to. If you leave this field blank, it will apply the selected hotfixes to all appliances in all tenants. You do not have to apply the hotfix to all tenants in the environment – you can specify which tenants will get the update by entering the tenant ID in the field.

The hotfix should be applied to the service provider org, Tenant 1000, before applying the hotfix to any customer tenants in the environment.

Note: The Service Provider and Resource Manager appliances are part of Tenant 1000. If you want to just upgrade these appliances, enter 1000 in the Org-ID field.

Note: You can find the tenant ID field by logging into Service Center and selecting the Tenants tab.

8. Click Run Job.

9. Horizon Version Manager will execute a workflow that completes the following steps for each appliance that will receive the hotfix:

  • Take a snapshot of the appliance virtual machines
  • Push the hotfix to the appliance
  • Install the hotfix
  • Resetart the DaaS services on the appliance

The job log will list all of the appliances that the update was attempted on, the status of the appliance, and the status of each tenant organization where the update was attempted.

As you can see, the process for deploying and managing hotfixes in Horizon DaaS 9 is fairly straightforward. The is only one manual step – uploading the hotfix files to the HVM appliance

Next week, we’ll return to our Horizon 8/Horizon 2006 series where we talk about building a desktop pool in the new environment.

Horizon 8.0 Part 8: Configuring Horizon for the First Time

The Horizon series took a hiatus over the last few weeks so I could prepare for VMworld.  If you haven’t done so, you can check out the VMworld content at in the VMworld Content library.  I highly recommend you do – there is a lot of good Horizon content in there.

We’re going to pick up right where we left off after Part 7 and start configuring our deployed connection servers.

Now that the Connection Server has been set up, it’s time to configure to work with vCenter to provision and manage desktops and RDSH servers.

Logging into the Horizon Administrator

Before anything can be configured, though, we need to first log into the Horizon Administrator management interface.  Horizon now uses an HTML5-based management interface, so it can be accessed from any modern web browser.

Prior to Horizon 2006, the main interface was built on Adobe Flex, which required Adobe Flash to be installed on any machine that you planned to use to administer Horizon. The HTML5 interface was introduced during the Horizon 7 lifecycle, and it reached feature parity within the last year.

In Horizon 2006, the Flash-based console has been removed, and the HTML5 console is now the only administrator console.  This makes it easier to perform administrative tasks in Horizon as you don’t need to install Flash or jump through hoops to get it temporarily enabled for a website.

To log in, take the following steps:

1. Open your web browser.

2. Navigate to https://<FQDN of connection server>/admin

3. Log in with the Administrator Account you designated (or with an account that is a member of the administrator group you selected) when you installed the Connection Server.

1

4. After you log in, you will be prompted for a license key.

2

Note:  The license keys are retrieved from your MyVMware site.  If you do not input a license key, you will not be able to connect to desktops or published applications after they are provisioned.  You can add or change a license key later under View Configuration –> Product Licensing and Usage. If you are using Horizon Universal or Horizon Subscription license, you will not have a license key. Licensing is handled by a cloud service through the Cloud Connector appliance.

5. Click Edit License.  Paste your license key from the MyVMware site into the license key box and click OK.

3

6. After your license key is installed, the Licensing area will show when your license expires and the features that are licensed in your deployment.

Configuring Horizon for the First Time

Once you’ve logged in and configured your license, you can start setting up the Horizon environment.  In this step, the Connection Server will be configured to talk to vCenter and Composer.

1.   Expand View Configuration and select Servers.

9

2.  Select the vCenter Servers tab and select Add…

10

3, Enter your vCenter server information.  The service account that you use in this section should be the vCenter Service Account that you created in Part 6.  Do not change anything in the Advanced Settings section.

Note: If you are using vCenter 5.5 or later, the username should be entered in User Principal Name format – username@fqdn.

11

4. If you have not updated the certificates on your vCenter Server, you will receive an Invalid Certificate Warning.  Click View Certificate to view and accept the certificate. 

Note: Old screenshot.

7

Note: Steps 5-8 refers to Horizon Composer. Composer is deprecated in Horizon 2006, and it will be removed in a future version. It is mainly here to support migrations from Horizon 7 to Horizon 8. If you are starting a new project, please use Instant Clones instead of Composer and Linked Clones, and do not configure Composer when integrating Horizon with vCenter.

These steps are included for completeness, and they may be required in some instances where you are adding a new vCenter to an existing environment. I will be using old screenshots for this section.

5.  Select the View Composer option that you plan to use with this vCenter.  The options are:

A. Do not use View Composer – View Composer and Linked Clones will not be available for desktop pools that use this vCenter.

B. View Composer is co-installed with vCenter Server – View Composer is installed on the vCenter Server, and the vCenter Server credentials entered on the previous screen will be used for connecting.  This option is only available with the Windows vCenter Server. (Note: This option should not be used as vCenter is now distributed as a virtual appliance and Composer runs on Windows Server.)

C. Standalone View Composer Server – View Composer is installed on a standalone Windows Server, and credentials will be required to connect to the Composer instance.  This option will work with both the Windows vCenter Server and the vCenter Server virtual appliance.

Note: The account credentials used to connect to the View Composer server must have local administrator rights on the machine where Composer is installed.  If they account does not have local administrator rights, you will get an error that you cannot connect.

8

6. If Composer is using an untrusted SSL certificate, you will receive a prompt that the certificate is invalid.  Click View Certificate and then accept.

For more information on installing a trusted certificate on your Composer server, please see Part 5.

9

7. The next step is to set up the Active Directory domains that Composer will connect to when provisioning desktops.  Click Add to add a new domain.

11

8. Enter the domain name, user account with rights to Active Directory, and the password and click OK.  The user account used for this step should be the account that was set up in Part 6.

Once all the domains have been added, click Next to continue.

10

9. The next step is to configure the advanced storage settings used by Horizon.  The two options to select on this screen are:

  • Reclaim VM Disk Space – Allows Horizon to reclaim disk space allocated to linked-clone virtual machines.
  • Enable View Storage Accelerator – View Storage Accelerator is a RAMDISK cache that can be used to offload some storage requests to the local system.  Regenerating the cache can impact IO operations on the storage array, and maintenance blackout windows can be configured to avoid a long train of witnesses.  The max cache size is 2GB.

After you have made your selections, click Next to continue.

13

10. Review the settings and click finish.

14

Configuring the Horizon Events Database

The last thing that we need to configure is the Horizon Events Database.  As the name implies, the Events Database is a repository for events that happen with the View environment.  Some examples of events that are recorded include logon and logoff activity and Composer errors.

Part 6 described the steps for creating the database and the database user account.

1. In the View Configuration section, select Event Configuration.

4

2. In the Event Database section, click Edit.

5

3. Enter the following information to set up the connection:

  • Database Server (if not installed to the default instance, enter as servername\instance)
  • Database Type
  • Port
  • Database name
  • Username
  • Password
  • Table Prefix (not needed unless you have multiple Connection Server environments that use the same events database – IE large “pod” environments)

6

Note: The only SQL Server instance that uses port 1433 is the default instance.  Named instances use dynamic port assignment that assigns a random port number to the service upon startup.  If the Events database is installed to a named instance, it will need to have a static port number.  You can set up SQL Server to listen on a static port by using this TechNet article.  For the above example, I assigned the port 1433 to the Composer instance since I will not have a named instance on that server.

If you do not configure a static port assignment and try to connect to a named instance on port 1433, you may receive an error that the server is not reachable.

5. If setup is successful, you should see a screen similar to the one below.  At this point, you can change your event retention settings by editing the event settings.

7

6. To edit the event retention settings, click Edit.  Select the length of time that you want events to be shown in View Administrator and classified as new. Then click OK for the change to take effect.

8

After completing these steps, your Horizon environment should be licensed, connected to your vCenter, and the event database should be configured. At this point, you are ready to create your parent image and deploy your first desktop pool. We’ll cover those steps in the next post.