Earlier this year, VMware closed the acquisition of Avi Networks. Avi Networks provides an application delivery controller solution designed for the multi-cloud world. While many ADC solutions aggregate the control plane and data plane on the same appliance, Avi Networks takes a different approach. They utilize a management appliance for the control plane and multiple service engine appliances that handle load balancing, web application firewall, and other services for the data plane.
Integrating Avi Networks with Workspace ONE Access
The Avi Networks Controller appliance offers multiple options for integrating the management console into enterprise environments for authentication management. One of the options that is avaiable is SAML. This enables integration into Workspace ONE Access and the ability to take advantage of the App Catalog, network access restrictions and step-up authentication when administrators sign in.
Before I walk through the steps for integrating Avi Networks into Workspace ONE Access via SAML, I want to thank my colleague Nick Robbins. He provided most of the information that enabled this integration to be set up in my lab environments and this blog post. Thank you, Nick!
There are three options that can be selected for the URL when configuring SAML integration for Avi Networks. The first option is to use the cluster VIP address. This is a shared IP address that is used by all management nodes when they are clustered. The second option is to use a fully-qualified domain name.
These options determine the SSO URL and entity ID that are used in the SAML configuration, and they are automatically generated by the system.
The third option is to use a user-provided entity ID.
For this walkthrough, we are going to use a fully-qualified domain name.
Prerequisites
Before we can begin configuring SAML integration, there are a few things we need to do.
First, we need to make sure a DNS record is in place for our Avi Controller. This will be used for the fully-qualified domain name that is used when signing into our system.
Second, we need to get the Workspace One Access IDP metadata. Avi does not import this automatically by providing a link the idp.xml file, so we need to download this file. The steps for retrieving the metadata are:
- Log into your Workspace One Access administrator console.
- Go to App Catalog
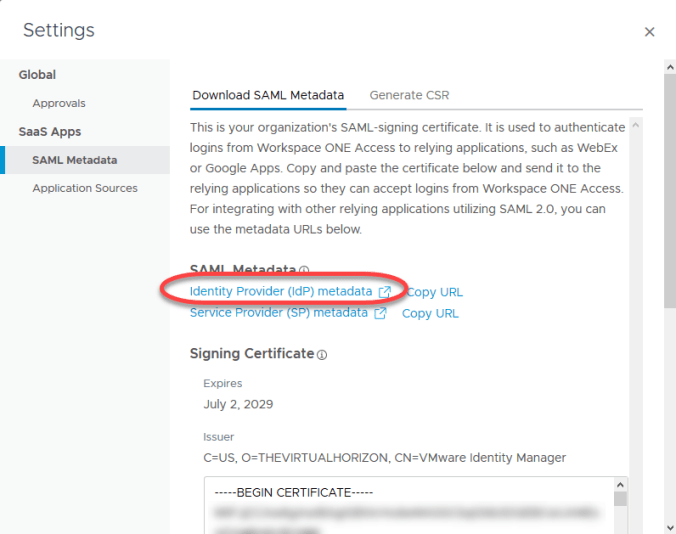
- Click Settings

- Under SaaS Apps, click SAML Metadata

- Right click on Identity Provider Metadata and select Save Link As. Save the file as idp.xml
- Open the idp.xml file in your favorite text editor. We will need to copy this into the Avi SAML configuration in the next step.
Avi Networks Configuration
The first thing that needs to be done is to configure an authentication profile to support SAML on the Avi Networks controller. The steps for this are:
- Log into your Avi Networks controller as your administrative user.
- Go to Templates -> Security -> Auth Profile.
- Click Create to create a new profile.
- Provide a name for the profile in the Name field.
- Under Type, select SAML.
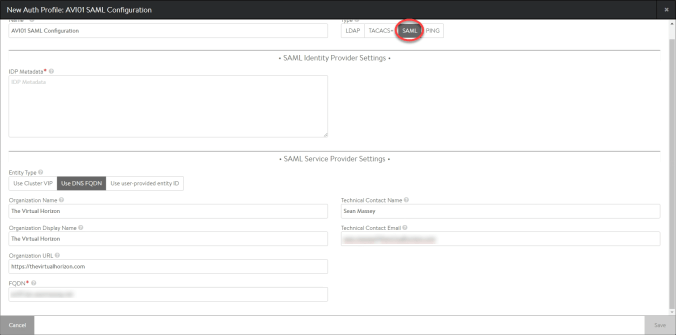
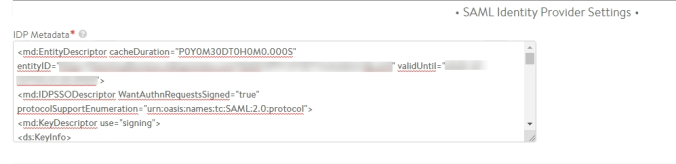
- Copy the Workspace ONE SAML idp information into the idp Metadata field. This information is located in the idp.xml file that we save in the previous section.
- Select Use DNS FQDN
- Fill in your organizational details.
- Enter the fully-qualified domain name that will be used for the SAML configuration in the FQDN field.
- Click Save
Next, we will need to collect some of our service provider metadata. Avi Networks does not generate an xml file that can be imported into Workspace ONE Access, so we will need to enter our metadata manually. There are three things we need to collect:
- Entity ID
- SSO URL
- Signing Certificate
We will get the Entity ID and SSO URL from the Service Provider Settings screen. Although this screen also has a field for signing certificate, it doesn’t seem to populate anyting in my lab, so we will have to get the certificate information from the SSL/TLS Certificate tab.
The steps for getting into the Service Provider Settings are:
- Go to Templates -> Security -> Auth Profile.
- Find the authentication profile that you created.
- Click on the Verify box on the far right side of the screen. This is the square box with a question mark in it.

- Copy the Entity ID and SSO URL and paste them into your favorite text editor. We will be using these in the next step.

- Close the Service Provider Settings screen by clicking the X in the upper right-hand corner.
Next, we need to get the signing certificate. This is the System-Default-Portal-Cert. The steps to get it are:
- Go to Templates -> Security -> SSL/TLS Certificates.
- Find the System-Default-Portal-Cert.
- Click the Export button. This is the circle with the down arrow on the right side of the screen.

- The certificate information is in the lower box labeled certificate.
- Click the Copy to Clipboard button underneath the certificate box.
- Paste the certificate in your favorite text editor. We will also need this in the next step.
- Click Done to close the Export Certificate screen.
Configuring the Avi Networks Application Catalog item in Workspace One Access
Now that we have our SAML profile created in the Avi Networks Controller, we need to create our Workspace ONE catalog entry. The steps for this are:
- Log into your Workspace One Access admin interface.
- Go to the Catalog tab.
- Click New to create a new App Catalog entry.

- Provide a name for the new Avi Networks entry in the App Catalog.

- If you have an icon to use, click Select File and upload the icon for the application.
- Click Next.
- Enter the following details. For the next couple of steps, you need to remain on the Configuration screen. Don’t click next until you complete all of the configuration items:
- Authentication Type: SAML 2.0
- Configuration Type: Manual
- Single Sign-On URL: Use the single sign-on URL that you copied from the Avi Networks Service Provider Settings screen.
- Recipient URL: Same as the Single Sign-On URL
- Application ID: Use the Entity ID setting that you copied from the Avi Networks Service Provider Settings screen.

- Username Format: Unspecified
- Username Value: ${user.email}
- Relay State URL: FQDN or IP address of your appliance
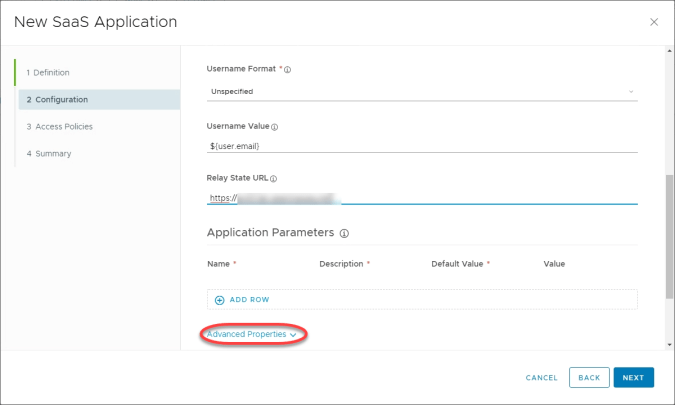
- Expand Advanced Properties and enter the following values:
- Sign Response: Yes
- Sign Assertion: Yes

- Copy the value of the System-Default-Portal-Cert certificate that you copied in the previous section into the Request Signature field.

- Application Login URL: FQDN or IP address of your appliance. This will enable SP-initiated login workflows.
- Click Next.
- Select an Access Policy to use for this application. This will determine the rules used for authentication and access to the application.
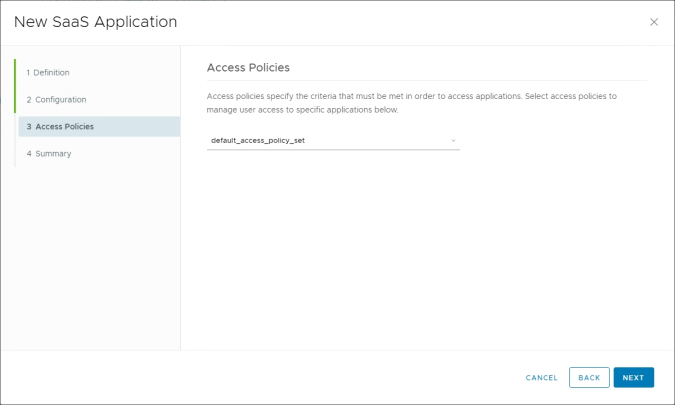
- Click Next.
- Review the summary of the configuration.

- Click Save and Assign
- Select the users or groups that will have access to this application and the deployment type.

- Click Save.
Enabling SAML Authentication in Avi Networks
In the last couple of steps, we created our SAML profile in Avi Networks and a SAML catalog item in Workspace One Access. However, we haven’t actually turned SAML on yet or assigned any users to roles. In this next section, we will enable SAML and grant superuser rights to SAML users.
Note: It is possible to configure more granular role-based access control by adding application parameters into the Workspace One Access catalog item and then mapping those parameters to different roles in Avi Networks. This walkthrough will just provide a simple setup, and deeper RBAC integration will be covered in a possible future post.
- Log into your Avi Networks Management Console.
- Go Administration -> Settings -> Authentication/Authorization
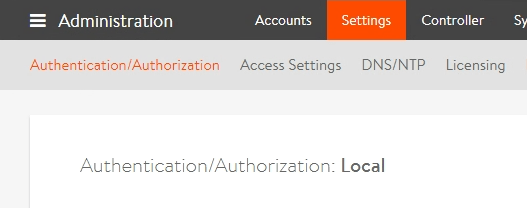
- Click the pencil icon to edit the Authentication/Authorization settings.
- Under Authentication, select Remote.

- Under Auth Profile, select the SAML profile that you created earlier.
- Make sure the Allow Local User Login box is checked. If this box is not checked, and there is a configuration issue, you will not be able to log back into the controller.
- Click Save.

- After saving the authentication settings, some new options will appear in the Authentication/Authorization screen to enable role mapping.
- Click New Mapping.

- For Attribute, select Any
- Check the box labelled Super User
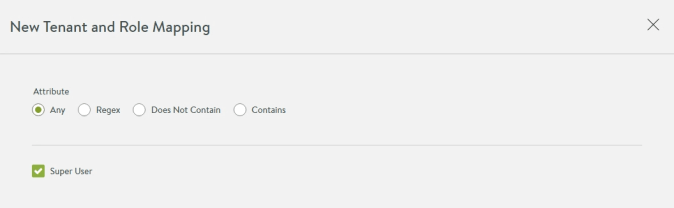
- Click Save.
SAML authentication is now configured on the Avi Networks Management appliance.
Testing SAML Authentication and Troubleshooting
So now that we have our authentication profiles configured in both Avi Networks and Workspace One Access, we need to test it to ensure our admin users can sign in. There are two tests that should be run. The first is launching Avi Networks from the Workspace One Access app catalog, and the second is doing an SP-initiated login by going to your Avi Networks URL.
In both cases, you should see a Workspace One Access authentication screen for login before being redirected to the Avi Networks management console.
In my testing, however, I had some issues in one of my labs where I would get a JSON error when attempting SAML authentication. If you see this error, and you validate that all of your settings match, then reboot the appliance. This solved the issue in my lab.
If SAML authentication breaks, and you need to gain access to the appliance management interface with a local account, then you need to provide a different URL. That URL is https://avi-management-fqdn-or-ip/#!/login?local=1.

You must be logged in to post a comment.