As I’ve started building more GPU-enabled workloads in my home lab, I’ve found myself repeating a few steps to get the required software installed. It involved multiple tools, and I was referencing multiple sources in the vendor documentation.
I wanted to pull everything together into one document – both to document my process so I can automate it and also to share so I can help others who are looking at the same thing.
So this post covers the steps for installing and configuring the NVIDIA drivers, CUDA toolkit, and/or the Container Toolkit on vSphere virtual machines.
Install NVIDA Driver Prequisites
There are a few prerequisites required before installing the NVIDIA drivers. This includes installing kernel headers, the programs required to compile the NVIDIA drivers, and disabling Nouveau. We will also install the NVIDIA CUDA Repo.
#Install Prerequisites
sudo apt-get install xfsprogs wget git python3 python3-venv python3-pip p7zip-full build-essential -y
sudo apt-get install linux-headers-$(uname -r) -y

#Disable Nouveau
lsmod | grep nouveau

cat <<EOF | sudo tee /etc/modprobe.d/blacklist-nouveau.conf
blacklist nouveau
options nouveau modeset=0
EOF
sudo update-initramfs -u
Reboot the system after the initramfs build completes.
sudo reboot
Install the NVIDIA Drivers
NVIDIA includes .run and .deb installer options for Debian-based operating systems. I use the .run option because that is what I am most familiar with. The run file will need to be made executable as it does not have these permissions by default. I also install using the --dkms flag so the driver will be recompiled automatically if the kernel is updated.
The vGPU drivers are distributed through the NVIDIA Enterprise Software Licensing portal through the NVIDIA Virtual GPU or AI Enterprise product sets and require a license to use If you are using PCI Passthrough instead of GRID, you can download the NVIDIA Data Center/Tesla Drivers from the data center driver download page.
I am using the NVAIE product set for some of my testing, so I will be installing a vGPU driver. The steps to install the Driver, CUDA Toolkit, and Container Toolkit are the same whether you are using a regular data center driver or the vGPU driver. You will not need to configure any licensing when using PCI Passthrough.
The drivers need to be downloaded, copied over to the virtual machine, and have the executable flag set on the file.
Click OK for any messages that are displayed during install. Once the installation is complete, reboot the server.
After the install completes, type the following command to verify that the driver is installed properly.
nvidia-smi
You should receive an output similar to the following:
Installing the CUDA Toolkit
Like the GRID Driver installer, NVIDIA distributes the CUDA Toolkit as both a .run and .deb installer. For this step, I’ll be using the .deb installer as it works with Debian’s built-in package management, can handle upgrades when new CUDA versions are released, and contains a multiple meta package installation options that are documented in the CUDA installation documentation.
By default, the CUDA toolkit installer will try to install an NVIDIA driver. Since this deployment is using a vGPU driver, we don’t want to use the driver included with CUDA. NVIDIA is very prescriptive about which driver versions work with vGPU, and installing a different driver, even if it is the same version, will result in errors.
The first step is to install the CUDA keyring and enable the contrib repository. The keyring file contains the repository information and the GPG signing key. Use the following commands to complete this step:
The next step is to update our Apt-Get repos and install the CUDA Toolkit. The CUDA toolkit requires a number of additional packages that will be installed alongside the main application.
The package installer does not add CUDA to the system PATH variable, so we need to do this manually. The way I’ve done this is to create a login script that applies for all users using the following command. The CUDA folder path is versioned, so this script to set the PATH variable will need to be updated when the CUDA version changes.
Once our script is created, we need to apply the updated PATH variable and test our CUDA Toolkit installation to make sure it is working properly.
source /etc/profile.d/nvidia.sh
nvcc --version
You should receive the following output if the PATH variable is updated properly.
If you receive a command not found error, then the PATH variable has not been set properly, and you need to review and rerun the script that contains your EXPORT command.
NVIDIA Container Toolkit
If you are planning to use container workloads with your GPU, you will need to install the NVIDIA Container Toolkit. The Container Toolkit provides a container runtime library and utilities to configure containers to utilize NVIDIA GPUs. The Container Toolkit is distributed from an apt repository.
Note: The CUDA toolkit is not required if you are planning to only use container workloads with the GPU. An NVIDIA driver is still required on the host or VM.
The first step for installing the NVIDIA Container Toolkit on Debian is to import the Container Toolkit apt repository.
Note: Other container runtimes are supported. Please see the documentation to see the supported container runtimes and their configuration instructions.
After restarting your container runtime, you can run a test workload to make sure the container toolkit is installed properly.
sudo docker run --rm --runtime=nvidia --gpus all ubuntu nvidia-smi
Using NVIDIA GPUs with Docker Compose
GPUs can be utilized with container workloads managed by Docker Compose. You will need to add the following lines, modified to fit your environment, to the container definition in your Docker Compose file. Please see the Docker Compose documentation for more details.
Your machine will need to check out a license if NVIDIA vGPU or NVAIE are being used, and the NVIDIA vGPU driver will need to be configured with a license server. The steps for setting up a cloud or local instance of the NVIDIA License System are beyond the scope of this post, but they can be found in the NVIDIA License System documentation.
Note: You do not need to complete these steps if you are using the Data Center Driver with PCI Passthrough. Licensing is only required if you are using vGPU or NVAIE features.
After generating and downloading the client configuration token, it will need to be placed onto your virtual machine. The file needs to be copied from your local machine to the /etc/nvidia/ClientConfigToken directory. This directory is locked down by default, and it requires root or sudo access to perform any file operations here. So you may need to copy the token file to your local home directory and use sudo to copy it into the ClientConfigToken directory. Or you can place the token file on a local web server and use wget/cURL to download it.
The final step is to configure vGPU features. This is done by editing the gridd.conf file and enabling vGPU. The first step is to copy the gridd.conf.template file using the following command.
The next step is to edit the file, find the line called FeatureType, and change the value from 0 to 1.
sudo nano /etc/nvidia/gridd.conf
Finally, restart the NVIDIA GRID daemon.
sudo systemctl restart nvidia-gridd
You can check the service status with the sudo systemctl status nvidia-gridd command to see if a license was successfully checked out. You can also log into your license service portal and review the logs to see licensing activity.
Sources
While creating this post, I pulled from the following links and sources.
The release of NVIDIA GRID 10 included a new version of the GRID license server. Rather than do an inplace upgrade of my existing Windows-based license servers that I was using in my lab, I decided to rebuild them on CentOS.
Prerequisites
In order to deploy the NVIDIA GRID license server, you will need two servers. The license servers should be deployed in a highly-available architecture since the features enabled by the GRID drivers will not function if a license cannot be checked out. These servers should be fully patched. All of my CentOS boxes run without a GUI. All of the install steps will be done through the console, so you will need SSH access to the servers.
The license servers only require 2 vCPU and 4GB of RAM for most environments. The license server component runs on Tomcat, so we will need to install Java and the Tomcat web server. We will do that as part of our install. Newer versions of Java default to IPv6, so if you are not using this technology in your environment, you will need to disable IPv6 on the server. If you don’t, the license server will not be listening on any IPv4 addresses. While there are other ways to change Java’s default behavior, I find it easier to just disable IPv6 since I do not use it in my environment.
First, we need to prepare the servers by installing and configuring our prerequisites. We need to disable IPv6, install Java and Tomcat, and configure the Tomcat service to start automatically.
If you are planning to deploy the license servers in a highly available configuration, you will need to perform all of these steps on both servers.
The first step is to disable IPv6. As mentioned above, Java appears to default to IPv6 for networking in recent releases on Linux.
The steps to do this are:
Open the sysctl.conf file with the following command (substitute your preferred editor for nano).
sudo nano /etc/sysctl.conf
Add the following two lines at the end of the file:
Note: There are other ways to prevent Java from defaulting to IPv6. These methods usually involve making changes to the application parameters when Java launches. I selected this method because it was the easiest route to implement and I do not use IPv6 in my lab.
After the system reboots, the install can proceed. The next steps are to install and configure Java and Tomcat.
Install Java and Tomcat using the following commands:
sudo yum install -y java tomcat tomcat-webapps
Enable the tomcat service so that it starts automtically on reboot
sudo systemctl enable tomcat.service
Start Tomcat.
sudo systemctl start tomcat.service
Finally, we will want to configure our JAVA_HOME variable. The license server includes a command line tool, nvidialsadmin, that can be used to configure password authentication for the license server management console, and that tool requires a JAVA_HOME variable to be configured. These steps will create the variable for all users on the system.
Run the following command to see the path to the Java install:
sudo alternatives –config java
Copy the path to the Java folder, which is in parenthesis. Do not include anyting after “jre/’
Create a Bash plugin for Java with the following command:
sudo nano /etc/profile.d/java.sh
Add the following lines to the file:
export JAVA_HOME=(Your Path to Java)
export PATH=$PATH:$JAVA_HOME/bin
Save the file.
Reboot the system.
Test to verify that the JAVA_HOME variable is set up properly
echo $JAVA_HOME
Installing the NVIDIA License Server
Now that the prerequisites are configured, the NVIDIA license server software can be installed. The license server binaries are stored on the NVIDIA Enterprise Licensing portal, and they will need to be downloaded on another machine and copied over using a tool like WinSCP.
The steps for installing the license server once the installer has been copied to the servers re:
Set the binary to be executable.
chmod +x setup.bin
Run the setup program in console mode.
sudo ./setup.bin -i console
The first screen is a EULA that will need to be accepted. To scroll down through the EULA, press Enter until you get to the EULA acceptance.
Press Y to accept the EULA.
When prompted, enter the path for the Tomcat WebApps folder. On CentOS, this path is:
/usr/share/tomcat
When prompted, press 1 to enable firewall rules for the license server. This will enable the license server port on TCP7070.
Since this is a headless server, the management port on TCP8080 will also need to be enabled. This will be done in a later step.
Press Enter to install.
When the install completes, press enter to exit the installer.
After the install completes, the management port firewall rules will need to be configured. While the management interface can be secured with usernames and passwords, this is not configured out of the box. The normal recommendation is to just use the browser on the local machine to set the configuration, but since this is a headless machine, that’s not avaialble either. For this step, I’m applying the rules to an internal zone and restricting access to the management port to the IP address of my management machine. The steps for this are:
Reload the firewall daemon so the new rules take effect:
sudo firewall-cmd –reload
Configuring the License Server For High Availability
Once the firewall rules for accessing the management port are in place, the server configuration can begin. These steps will consist of configuring the high availability features. Registering the license servers with the NVIDIA Licensing portal and retrieving and applying licenses will not be handled in this step.
In order to set the license servers up for high availability, you will need two servers running the same version of the license server software. You will also need to identify which servers will be the primary and secondary servers in the infrastructure.
Open a web browser on your management machine and go to http://<primary license server hostname or IP>:8080/licserver
Click on Configuration
In the License Generation section, fill in the following details:
Backup URI: http://<secondary license server hostname or IP>:7070/fne/bin/capability
Main URI: http://<primary license server hostname or IP>:7070/fne/bin/capability
In the Settings for server to server sync between License servers section, fill in the following details:
Synchronization to fne enabled: True
Main FNE Server URI: http://<primary license server hostname or IP>:7070/fne/bin/capability
Click Save.
Open a new browser window or tab and go to go to http://<secondary license server hostname or IP>:8080/licserver
Click on Configuration
In the License Generation section, fill in the following details:
Backup URI: http://<secondary license server hostname or IP>:7070/fne/bin/capability
Main URI: http://<primary license server hostname or IP>:7070/fne/bin/capability
In the Settings for server to server sync between License servers section, fill in the following details:
Synchronization to fne enabled: True
Main FNE Server URI: http://<primary license server hostname or IP>:7070/fne/bin/capability
Click Save.
Summary
After completing the high availability setup section, the license servers are ready for the license file. In order to generate and install this, the two license servers will need to be registered with the NVIDIA licensing service. The steps to complete those tasks will be covered in a future post.
When IT administrators think of GPUs, the first thing that comes to mind for many is gaming. But GPUs also have business applications. They’re mainly found in high end workstations to support graphics intensive applications like 3D CAD and medical imaging.
But GPUs will have other uses in the enterprise. Many of the emerging technologies, such as artificial intelligence and deep learning, utilize GPUs to perform compute operations. These will start finding their way into the data center, either as part of line-of-business applications or as part of IT operations tools. This could also allow the business to utilize GRID environments after hours for other forms of data processing.
This guide will show you how to build headless virtual machines that can take advantage of NVIDIA GRID vGPU for GPU compute and CUDA. In order to do this, you will need to have a Pascal Series NVIDIA Tesla card such as the P4, P40, or P100 and the GRID 5.0 drivers. The GRID components will also need to be configured in your hypervisor, and you will need to have the GRID drivers for Linux.
I’ll be using CentOS 7.x for this guide. My base CentOS configuration is a minimal install with no graphical shell and a few additional packages like Nano and Open VM Tools. I use Bob Planker’s guide for preparing my VM as a template.
The steps for setting up a headless CentOS VM with GRID are:
Deploy your CentOS VM. This can be from an existing template or installed from scratch. This VM should not have a graphical shell installed, or it should be in a run mode that does not execute the GUI.
Attach a GRID profile to the virtual machine by adding a shared PCI device in vCenter. The selected profile will need to be one of the Virtual Workstation profiles, and these all end with a Q.
GRID requires a 100% memory reservation. When you add an NVIDIA GRID shared PCI device, there will be an associated prompt to reserve all system memory.
Update the VM to ensure all applications and components are the latest version using the following command: yum update -y
In order to build the GRID driver for Linux, you will need to install a few additional packages. Install these packages with the following command: yum install -y epel-release dkms libstdc++.i686 gcc kernel-devel
Copy the Linux GRID drivers to your VM using a tool like WinSCP. I generally place the files in /tmp.
Make the driver package executable with the following command: chmod +X NVIDIA-Linux-x86_64-384.73-grid.run
Execute the driver package. When we execute this, we will also be adding the –dkms flag to support Dynamic Kernel Module Support. This will enable the system to automatically recompile the driver whenever a kernel update is installed. The commands to run the the driver install are: bash ./NVIDIA-Linux-x86_64-384.73-grid.run –dkms
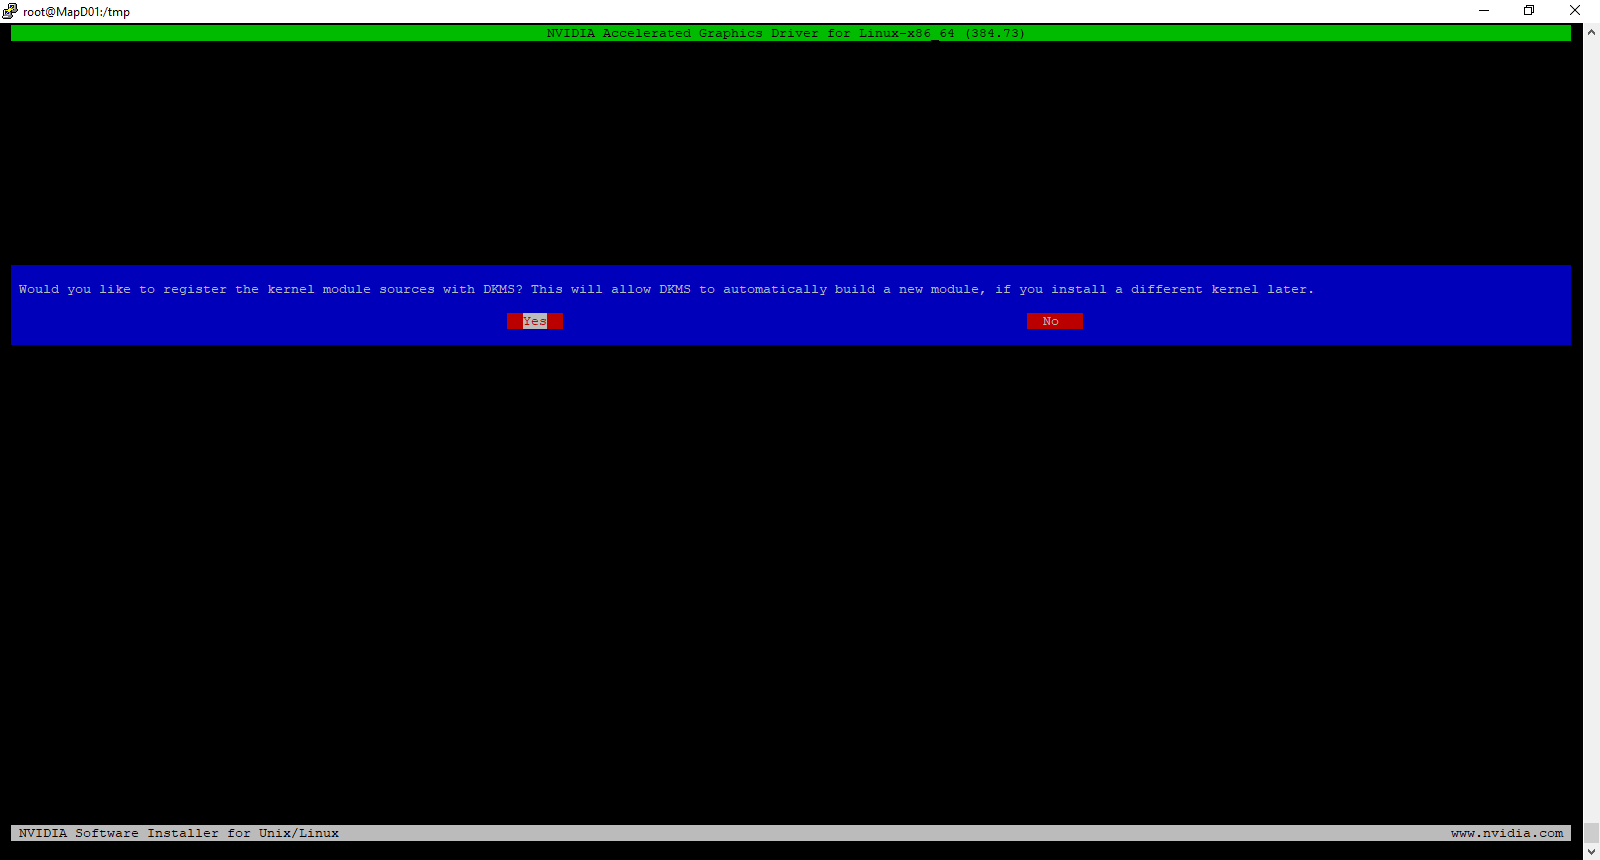
When prompted, select yes to register the kernel module sources with DKMS by selecting Yes and pressing Enter.
You may receive an error about the installer not being able to locate the X Server path. Click OK. It is safe to ignore this error.
Install the 32-bit Compatibility Libraries by selecting Yes and pressing Enter.
At this point, the installer will start to build the DKMS module and install the driver.
After the install completes, you will be prompted to use the nvidia-xconfig utility to update your X Server configuration. X Server should not be installed because this is a headless machine, so select No and press Enter.
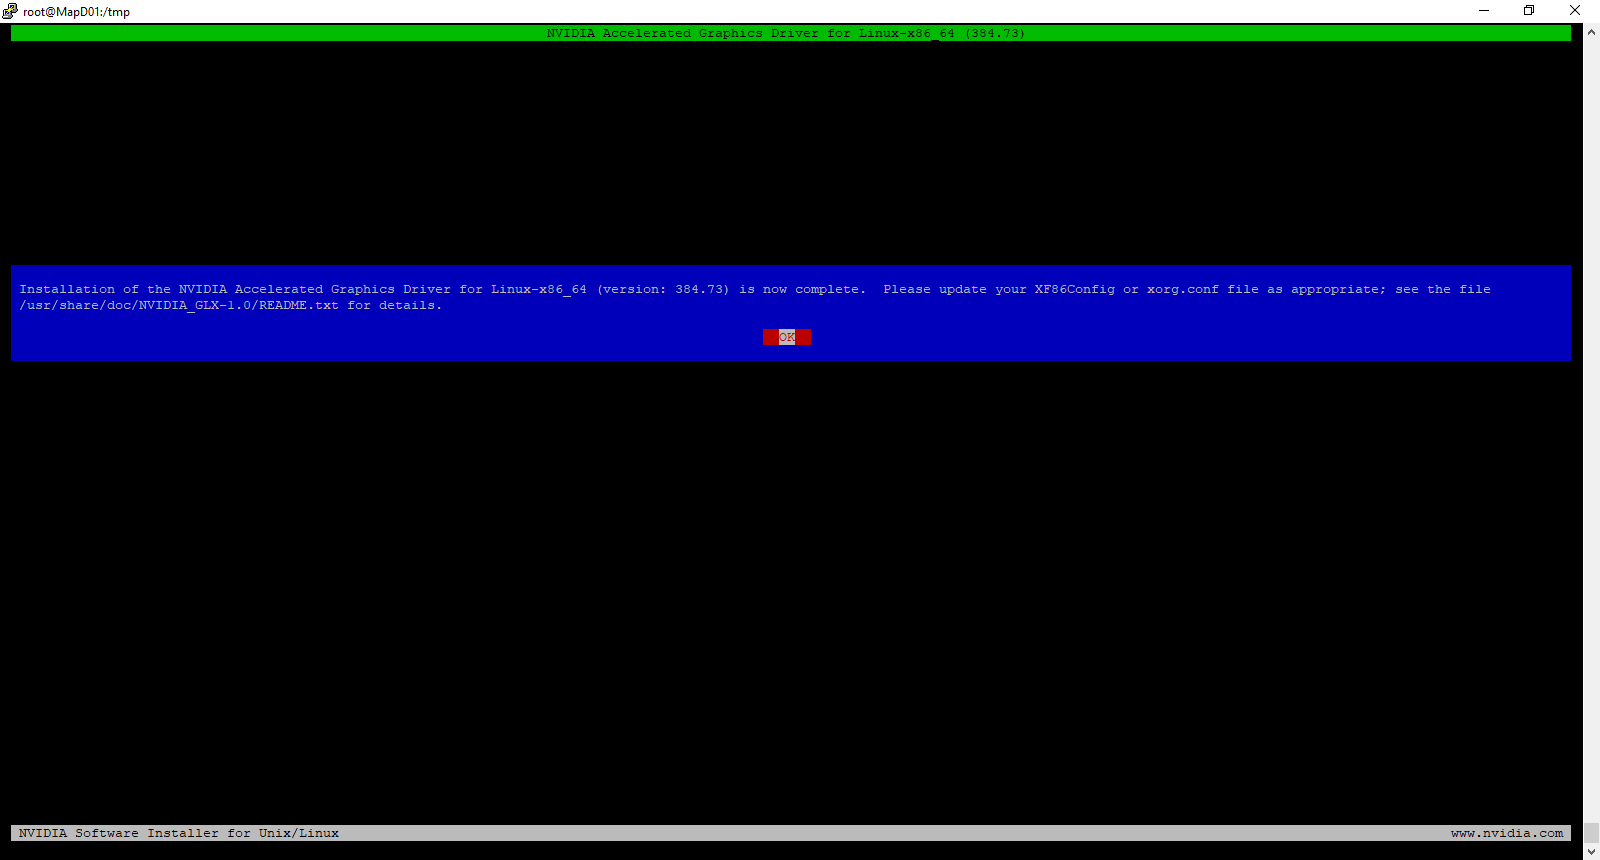
The install is complete. Press Enter to exit the installer.
To validate that the NVIDIA drivers are installed and running properly, run nvidia-smi to get the status of the video card.
Next, we’ll need to configure GRID licensing. We’ll need to create the GRID licensing file from a template supplied by NVIDIA with the following command: cp /etc/nvidia/gridd.conf.template /etc/nvidia/gridd.conf
Edit the GRID licensing file using the text editor of your choice. I prefer Nano, so the command I would use is: nano /etc/nvidia/gridd.conf
Fill in the ServerAddress and BackupServerAddress fields with the fully-qualified domain name or IP addresses of your licensing servers.
Set the FeatureType to 2 to configure the system to retrieve a Virtual Workstation license. The Virtual Workstation license is required to support the CUDA features for GPU Compute.
Save the license file.
Restart the GRID Service with the following command: service nvidia-gridd restart
Validate that the machine retrieved a license with the following command: grep gridd /var/log/messages
Make the toolkit installer executable. chmod +x cuda_9.0.176_384.81_linux-run.sh
Execute the CUDA Toolkit installer. bash cuda_9.0.176_384.81_linux-run.sh
Accept the EULA.
You will be prompted to download the CUDA Driver. Press N to decline the new driver. This driver does not match the NVIDIA GRID driver version, and it will break the NVIDIA setup. The GRID driver in the VM has to match the GRID software that is installed in the hypervisor.
When prompted to install the CUDA 9.0 toolkit, press Y.
Accept the Default Location for the CUDA toolkit.
When prompted to create a symlink at /usr/local/cuda, press Y.
When prompted to install the CUDA 9.0 samples, press Y.
Accept the default location for the samples.
Reboot the virtual machine.
Log in and run nvidia-smi again. Validate that you get the table output similar to step 15. If you do not receive this, and you get an error, it means that you likely installed the driver that is included with the CUDA toolkit. If that happens, you will need to start over.
At this point, you have a headless VM with the NVIDIA Drivers and CUDA Toolkit installed. So what can you do with this? Just about anything that requires CUDA. You can experiment with deep learning frameworks like Tensorflow, build virtual render nodes for tools like Blender, or even use Matlab for GPU compute.
One of the cooler tech announcements at VMworld 2017 was on display at the NVIDIA booth. It wasn’t really an announcement, per se, but more of a demonstration of a long awaited solution to a very difficult challenge in the virtualization space.
NVIDIA displayed a tech demo of vMotion support for VMs with GRID vGPU running on ESXi. Along with this demo was news that they had also solved the problem of suspend and resume on vGPU enabled machines, and these solutions would be included in future product releases. NVIDIA announced live migration support for XenServer earlier this year.
Rob Beekmans (Twitter: @robbeekmans) also wrote about this recently, and his blog has video showing the tech demos in action.
I want to clarify that these are tech demos, not tech previews. Tech Previews, in VMware EUC terms, usually means a feature that is in beta or pre-release to get real-world feedback. These demos likely occurred on a development version of a future ESXi release, and there is no projected timeline as to when they will be released as part of a product.
Challenges to Enabling vMotion Support for vGPU
So you’re probably thinking “What’s the big deal? vMotion is old hat now.” But when vGPU is enabled on a virtual machine, it requires that VM to have direct, but shared, access to physical hardware on the system – in this case, a GPU. And vMotion never worked if a VM had direct access to hardware – be it a PCI device that was passed through or something plugged into a USB port.
If we look at how vGPU works, each VM has a shared PCI device added to it. This shared PCI device provides shared access to a physical card. To facilitate this access, each VM gets a portion of the GPU’s Base Address Register (BAR), or the hardware level interface between the machine and the PCI card. In order to make this portable, there has to be some method of virtualizing the BAR. A VM that migrates may not get the same address space on the BAR when it moves to a new host, and any changes to that would likely cause issues to Windows or any jobs that the VM has placed on the GPU.
There is another challenge to enabling vMotion support for vGPU. Think about what a GPU is – it’s a (massively parallel) processor with dedicated RAM. When you add a GPU into a VM, you’re essentially attaching a 2nd system to the VM, and the data that is in the GPU framebuffer and processor queues needs to be migrated along with the CPU, system RAM, and system state. So this requires extra coordination to ensure that the GPU releases things so they can be migrated to the new host, and it has to be done in a way that doesn’t impact performance for other users or applications that may be sharing the GPU.
Suspend and Resume is another challenge that is very similar to vMotion support. Suspending a VM basically hibernates the VM. All current state information about the VM is saved to disk, and the hardware resources are released. Instead of sending data to another machine, it needs to be written to a state file on disk. This includes the GPU state. When the VM is resumed, it may not get placed on the same host and/or GPU, but all the saved state needs to be restored.
Hardware Preemption and CUDA Support on Pascal
The August 2016 GRID release included support for the Pascal-series cards. Pascal series cards include hardware support for preemption. This is important for GRID because it uses time-slicing to share access to the GPU across multiple VMs. When a time-slice expires, it moves onto the next VM.
This can cause issues when using GRID to run CUDA jobs. CUDA jobs can be very long running, and the job is stopped when the time-slice is expired. Hardware preemption enables long-running CUDA tasks to be interrupted and paused when the time-slice expires, and those jobs are resumed when that VM gets a new time-slice.
So why is this important? In previous versions of GRID, CUDA was only available and supported on the largest profiles. So to support the applications that required CUDA in a virtual virtual environment, and entire GPU would need to be dedicated to the VM. This could be a significant overallocation of resources, and it significantly reduced the density on a host. If a customer was using M60s, which have two GPUs per card, then they may be limited to 4 machines with GPU access if they needed CUDA support.
With Pascal cards and the latest GRID software, CUDA support is enabled on all vDWS profiles (the ones that end with a Q). Now customers can provide CUDA-enabled vGPU profiles to virtual machines without having to dedicate an entire GPU to one machine.
This has two benefits. First, it enables more features in the high-end 3D applications that run on virtual workstations. Not only can these machines be used for design, they can now utilize the GPU to run models or simulations.
The second benefit has nothing to do with virtual desktops or applications. It actually allows GPU-enabled server applications to be fully virtualized. This potentially means things like render farms or, in a future looking state, virtualized AI inference engines for business applications or infrastructure support services. One potentially interesting use case for this is running MapD, a database that runs entirely in the GPU, on a virtual machine.
Analysis
GPUs have the ability to revolutionize enterprise applications in the data center. They can potentially bring artificial intelligence, deep learning, and massively parallel computing to business apps.
vMotion support is critical in enabling enterprise applications in virtual environments. The ability to move applications and servers around is important to keeping services available.
By enabling hardware preemption and vMotion support, it now becomes possible to virtualize the next generation of business applications. These applications will require a GPU and CUDA support to improve performance or utilize deep learning algorithms. Applications that require a GPU and CUDA support can be moved around in the datacenter without impacting the running workloads, maintaining availability and keeping active jobs running so they do not have to be restarted.
This also opens up new opportunities to better utilize data center resources. If I have a large VDI footprint that utilizes GRID, I can’t vMotion any running desktops today to consolidate them on particular hosts. If I can use vMotion to consolidate these desktops, I can utilize the remaining hosts with GPUs to perform other tasks with GPUs such as turning them into render farms, after-hours data processing with GPUs, or other tasks.
This may not seem important now. But I believe that deep learning/artificial intelligence will become a critical feature in business applications, and the ability to turn my VDI hosts into something else after-hours will help enable these next generation applications.
This morning, NVIDIA announced the latest version of the graphics virtualization stack – NVIDIA GRID 5.0. This latest releases continues the trend that NVIDIA started two years ago when they separated the GRID software stack from the Tesla data center GPUs in the GRID 2.0 release.
GRID 5.0 adds several new key features to the GRID product line. Along with these new features, NVIDIA is also adding a new Tesla card and rebranding the Virtual Workstation license SKU.
Quadro Virtual Data Center Workstation
Previous versions of GRID contained profiles designed for workstations and high-end professional applications. These profiles, which ended in a Q, provided Quadro level features for the most demanding applications. They also required the GRID Virtual Workstation license.
NVIDIA has decided to rebrand the professional series capabilities of GRID to better align with their professional visualization series of products. The GRID Virtual Workstation license will now be called the Quadro Virtual Data Center Workstation license. This change helps differentiate the Virtual PC and Apps features, which are geared towards knowledge users, from the professional series capabilities.
Tesla P6
The Tesla P6 is the Pascal-generation successor to the Maxwell-generation M6 GPU. It provides a GPU purpose-built for blade servers. In addition to using a Pascal-generation GPU, the P6 also increases the amount of Framebuffer to 16GB. The P6 can now support up to 16 users per blade, which provides more value to customers who want to adopt GRID for VDI on their blade platform.
Pascal Support for GRID
The next generation GRID software adds support for the Pascal-generation Tesla cards. The new cards that are supported in GRID 5.0 are the Tesla P4, P6, P40, and P100.
The P40 is the designated successor to the M60 card. It is a 1U board with a single GPU and 24GB of Framebuffer. The increased framebuffer also allows for a 50% increase in density, and the P40 can handle up to 24 users per board compared to the 16 users per M60.
Edit for Clarification – The comparison between the M60 and the P40 was done using the 1GB GRID profiles. The M60 can support up to 32 users per board when assigning each VM 512MB of framebuffer, but this option is not available in GRID 5.0.
On the other end of the scale is the P4. This is a 1U small form factor Pascal GPU with 8GB of Framebuffer. Unlike other larger Tesla boards, this board can run on 75W, so it doesn’t need any additional power. This makes it suitable for cloud and rack-dense computing environments.
In addition to better performance, the Pascal cards have a few key advantages over the previous generation Maxwell cards. First, there is no need to use the GPU-Mode-Switch utility to convert the Pascal board from compute mode to graphics mode. There is, however, a manual step that is required to disable ECC memory on the Pascal boards, but this is built into the NVIDIA-SMI utility. This change streamlines the GRID deployment process for Pascal boards.
The second advantage involves hardware-level preemption support. In previous generations of GRID, CUDA support was only available when using the 8Q profile. This dedicated an entire GPU to a single VM. Hardware preemption support enables Pascal cards to support CUDA on all profiles.
To understand why hardware preemption is required, we have to look at how GRID shares GPU resources. GRID uses round-robin time slicing to share GPU resources amongst multiple VMs, and each VM gets a set amount of time on the GPU. When the time slice expires, the GPU moves onto the next VM. When the GPU is rendering graphics to be displayed on the screen, the round-robin method works well because the GPU can typically complete all the work in the allotted time slice. CUDA jobs, however, pose a challenge because jobs can take hours to complete. Without the ability to preempt the running jobs, the CUDA jobs could fail when the time slice expired.
Preemption support on Pascal cards allows VMs with any virtual workstation profile to have access to CUDA features. This enables high-end applications to use smaller Quadro vDWS profiles instead of having to have an entire GPU dedicated to that specific user.
Fixed Share Round Robin Scheduling
As mentioned above, GRID uses round robin time slicing to share the GPU across multiple VMs. One disadvantage of this method is that if a VM doesn’t have anything for the GPU to do, it is skipped and the time slice is given to the next VM in line. This prevents the GPU from being idle if there are VMs that can utilize it. It also means that some VMs may get more access to the GPU than others.
NVIDIA is adding a new scheduler option in GRID 5.0. This option is called the Fixed Share Scheduler. The Fixed Share scheduler grants each VM that is placed on the GPU an equal share of resources. Time slices are still used in the fixed share scheduler, and fi a VM does not have any jobs for the GPU to execute, the GPU will be idled during that time slice.
As VMs are placed onto, or removed from, a GPU, the share of resources available to each VM is recalculated, and shares are redistributed to ensure that all VMs get equal access.
Enhanced Monitoring
GRID 5.0 adds new monitoring capabilities to the GRID platform. One of the new features is per-application monitoring. Administrators can now view GPU utilization on a per-application basis using the NVIDIA-SMI tool. This new feature allows administrators to see exactly how much of the GPU resources each application is using.
License Enforcement
In previous versions of GRID, the licensing server basically acted as an auditing tool. A license was required for GRID, but the GRID features would continue to function even if the licensed quantity was exceeded. GRID 5.0 changes that. Licensing is now enforced with GRID, and if a license is not available, the GRID drivers will not function. Users will get reduced quality when they sign into their desktops.
Because licensing is now enforced, the license server has built-in HA functionality. A secondary licensing server can be specified in the config of both the license server and the driver, and if the primary is not available, it will fall back to the secondary.
Other Announced Features
Two GRID 5.0 features were announced at Citrix Synergy back in May. The first was Citrix Director support for monitoring GRID. The second feature is beta Live Migration support for XenServer.
Over the last year, the great folks over at NVIDIA have been very busy. Last year at this time, they announced the M6 and M60 cards, bringing the Maxwell architecture to GRID, adding support for blade server architectures, and introducing the software licensing model for the drivers. In March, GRID 3.0 was announced, and it was a fix for the new licensing model.
Today, NVIDIA announced the August 2016 release of GRID. This is the latest edition of the GRID software stack, and it coincides with the general availability of the high-density M10 card that supports up to 64 users.
So aside from the hardware, what’s new in this release?
The big addition to the GRID product line is monitoring. In previous versions of GRID, there was a limited amount of performance data that any of the NVIDIA monitoring tools could see. NVIDIA SMI, the hypervisor component, could only really report on the GPU core temperature and wattage, and the NVIDIA WMI counters on Windows VMs could only see framebuffer utilization.
The GRID software now exposes more performance metrics from the host and the guest VM level. These metrics include discovery of the vGPU types currently in use on the physical card as well as utilization statistics for 3D, encode, and decode engines from the hypervisor and guest VM levels. These stats can be viewed using the NVIDIA-SMI tool in the hypervisor or by using NVIDIA WMI in the guest OS. This will enable 3rd-party monitoring tools, like Liquidware Stratusphere UX, to extract and analyze the performance data. The NVIDIA SDK has been updated to provide API access to this data.
Monitoring was one of the missing pieces in the GRID stack, and the latest release addresses this. It’s now possible to see how the GPU’s resources are being utilized and if the correct profiles are being utilized.
The latest GRID release supports the M6, M60 and M10 cards, and customers have an active software support contract with NVIDIA customers. Unfortunately, the 1st generation K1 and K2 cards are not supported.
This morning, NVIDIA announced the inaugural class of the GRID Community Advisors program. As described in the announcement blog, the program “brings together the talents of individuals who have invested significant time and resources to become experts in NVIDIA products and solutions. Together, they give the entire NVIDIA GRID ecosystem access to product management, architects and support managers to help ensure we build the right products.”
I’m honored, and excited, to be a part of the inaugural class of the GRID Community Advisors Program along with several big names in the end-user computing and graphics virtualization fields. The other members of this 20-person class are:
Author Node:This post has been a few months in the making. While GRIDDays was back in March, I’ve had a few other projects that have kept this on the sidelines until now. This is Part 1. Part 2 will be coming at some point in the future. I figured 1200 words on this was good enough for one chunk.
The general rule of thumb is that if a virtual desktop requires some dedicated hardware – examples include serial devices, hardware license dongles, and physical cards, it’s probably not a good fit to be virtualized. This was especially true of workloads that required high-end 3D acceleration. If a virtual workload required 3D graphics, multiple high-end Quadro cards hard to be installed in the server and then passed through to the virtual machines that required them.
Since pass-through GPUs can’t be shared amongst VMs, this design doesn’t scale well. There is a limit to the number of cards I could install in a host, and that limited the number of 3D workloads I could run. If I needed more, I would have to add hosts. It also limits the flexibility in the environment as VMs with pass-through hardware can’t easily be moved to a new host if maintenance is needed or a hardware failure occurs.
NVIDIA created the GRID products to address the challenges of GPU virtualization. GRID technology combines purpose-built graphics hardware, software, and drivers to allow multiple virtual machines to access a GPU.
I’ve always wondered how it worked, and how it ensured that all configured VMs had equal access to the GPU. I had the opportunity to learn about the technology and the underlying concepts a few weeks ago at NVIDIA GRID Days.
Disclosure: NVIDIA paid for my travel, lodging, and some of my meals while I was out in Santa Clara. This has not influenced the content of this post.
Note: All graphics in this slide are courtesy of NVIDIA.
How it Works – Hardware Layer
So how does a GRID card work? In order to understand it, we have to start with the hardware. A GRID card is a PCIe card with multiple GPUs on the board. The hardware includes the same features that many of the other NVIDIA products have including framebuffer (often referred to as video memory), graphics compute cores, and hardware dedicated to video encode and decode.
Interactions between an operating system and a PCIe hardware device happen through the base address register. Base address registers are used to hold memory addresses used by a physical device. Virtual machines don’t have full access to the GPU hardware, so they are allocated a subset of the GPU’s base address registers for communication with the hardware. This is called a virtual BAR.
Access to the GPU Base Address Registers, and by extension the Virtual BAR, is handled through the CPU’s Memory Management Unit. The MMU handles the translation of the virtual BAR memory addresses into the corresponding physical memory addresses used by the GPU’s BAR. The translation is facilitated by page tables managed by the hypervisor.
The benefit of the virtual bar and hardware-assisted translations is that it is secure. VMs can only access the registers that they are assigned, and they cannot access any other locations outside of the virtual BAR.
The architecture described above – assigning a virtual base address register space that corresponds to a subset of the physical base address register allows multiple VMs to securely share one physical hardware device. That’s only one part of the story. How does work actually get from the guest OS driver to the GPU? And how does the GPU actually manage GPU workloads from multiple VMs?
When the NVIDIA driver submits a job or workload to the GPU, it gets placed into a channel. A channel is essentially a queue or a line that is exposed through each VM’s virtual BAR. Each GPU has a fixed number of channels available, and channels are allocated to each VM by dividing the total number of channels by the number of users that can utilize a profile. So if I’m using a profile that can support 16 VMs per GPU, each VM would get 1/16th of the channels.
When a virtual desktop user opens an application that requires resources on the GPU, the NVIDIA driver in the VM will dedicate a channel to that application. When that application needs the GPU to do something, the NVIDIA driver will submit that job to channels allocated to the application on the GPU through the virtual BAR.
So now that the application is queue up for execution, something needs to get it into the GPU for execution. That job is handled by the scheduler. The scheduler will move work from active channels into the GPU engines. The GPU has four engines for handling a few different tasks – graphics compute, video encode and decode, and a copy engine. The GPU engines are timeshared (more on that below), and they execute jobs in parallel.
When active jobs are placed on an engine, they are executed sequentially. When a job is completed, the NVIDIA driver is signaled that the work has been completed, and the scheduler loads the next job onto the engine to begin processing.
Scheduling
There are two types of scheduling in the computing world – sequential and parallel. When sequential scheduling is used, a single processor executes each job that it receives in order. When it completes that job, it moves onto the next. This can allow a single fast processor to quickly move through jobs, but complex jobs can cause a backup and delay the execution of waiting jobs.
Parallel scheduling uses multiple processors to execute jobs at the same time. When a job on one processor completes, it moves the next job in line onto the processor. Individually, these processors are too slow to handle a complex job. But they prevent a single job from clogging the pipeline.
A good analogy to this would be the checkout lane at a department store. The cashier (and register) is the processor, and each customer is a job that needs to be executed. Customers are queued up in line, and as the cashier finishes checking out one customer, the next customer in the queue is moved up. The cashier can usually process users efficiently and keep the line moving, but if a customer with 60 items walks into the 20 items or less lane, it would back up the line and prevent others from checking out.
This example works for parallel execution as well. Imagine that same department store at Christmas. Every cash register is open, and there is a person at the front of the line directing where people go. This person is the scheduler, and they are placing customers (jobs) on registers (GPU engines) as soon as they have finished with their previous customer.
Graphics Scheduling
So how does GRID ensure that all VMs have equal access to the GPU engines? How does it prevent one VM from hogging all the resources on a particular engine?
The answer comes in the way that the scheduler works. The scheduler uses a method called round-robin time slicing. Round-robin time slicing works by giving each channel a small amount of time on a GPU engine. The channel has exclusive access to the GPU engine until the timeslice expires or until there are no more work items in the channel.
If all of the work in a channel is completed before the timeslice expires, any spare cycles are redistributed to other channels or VMs. This ensures that the GPU isn’t sitting idle while jobs are queued in other channels.
The next part of the Understanding vGPU series will cover memory management on the GRID cards.
When GRID 2.0 was announced at VMworld 2015, it included a licensing component for the driver and software portion of the component. NVIDIA has recently revised the licensing and simplified the licensing model. They have also added a subscription-based model for customers that don’t want to buy a perpetual license and pay for support on a yearly basis.
Major Changes
There are a few major changes to the licensing model. The first is that the Virtual Workstation Extended licensing tier has been deprecated, and the features from this level have been added into the Virtual Workstation licensing tier. This means that high-end features, such as dedicating an entire GPU to a VM and CUDA support, are now available in the Virtual Workstation licensing tier.
The second major change is a licensing SKU for XenApp and Published Applications. In the early version of GRID 2.0, licensing support for XenApp and Horizon Published Applications was complicated. The new model provides for per-user licensing for server-based computing.
The third major change is a change to how the license is enforced. In the original incarnation of GRID 2.0, a license server was required for utilizing the GRID 2.0 features. That server handled license enforcement, and if it wasn’t available, or there were no licenses available, the desktops were not usable. In the latest license revision, the license has shifted to EULA enforcement. The license server is still required, but it is now used for reporting and capacity planning.
The final major change is the addition of a subscription-based licensing model. This new model allows organizations to purchase licenses as they need them without having to do a large capital outlay. The subscription model includes software support baked into the price. Subscriptions can also be purchased in multi-year blocks, so I can pay for three years at one time.
One major difference between perpetual and subscription models is what happens when support expires. In the perpetual model, you know the licensing. If you allow support to expire, you can still use these features. However, you will not be able to get software updates. In a subscription model, the licensed features are no longer available as soon as the subscription expires.
The new pricing for GRID 2.0 is:
Name
Perpetual Licensing
Subscription Licensing (yearly)
Virtual Apps
$20 + $5 SUMS
$10
Virtual PC
$100+$25 SUMS
$50
Virtual Workstation
$450 + $100 SUMS
$250
Software support for the 1st year is not included when you purchase a perpetual license. Purchasing the 1st year of support is required when buying perpetual licenses. A license is required if you plan to use a direct pass-thru with a GRID card.


You must be logged in to post a comment.